Let That Which Does Not Matter Truly Slide
Tagged as Linux
Written on 2008-09-25 22:23:34
Being unemployed is starting to get scary if only because I don't know how I'm going to make it to the next thing. There's a next thing I'd really like to see happen though and I'm prepared to risk a fair amount to get it. I may need an interim thing to pay bills until the next thing is actuality though. That's tricky business. If you know of anybody that would be interested in a contract I.T./Linux/Computer nerd, please let me know to get in touch with them.My buddy Chris Blair started his blog in the last few days with a review of an old Business Sim game but he's already got up entries on everything from Football to SpaceX's Falcon1. Good stuff.
Kris Osterhage also recently dove into the blogging world first with blogspot but then quickly migrated to livejournal. He's blogged on gaming and hardware mostly but he recently put up some politics entries and...well, I'm not ready to dive into that yet. Call me preoccupied. Those conversations can get long and bitter and for the moment, my energies are best spent pretending this isn't an election year.
Now, on to RedLinux. At long last, I've got a really fast mirror for RedLinux so if you're looking to download an ISO to try it out, downloading it from my Amazon S3 mirror is the way to go. Just click here. So, if you'd like to try it out just download that ISO, burn the ISO to a CD (if you're not familiar with this google can help) and reboot your computer with the CD in the drive. Then follow my simple installation guide:
*****
Wait for the CD to boot to the login screen. Type guest as the username, hit enter and then type guest as the password and hit enter. Tada. You're now using RedLinux. To get to my analog for a "start menu" just right-click on the desktop. You'll see something like this.
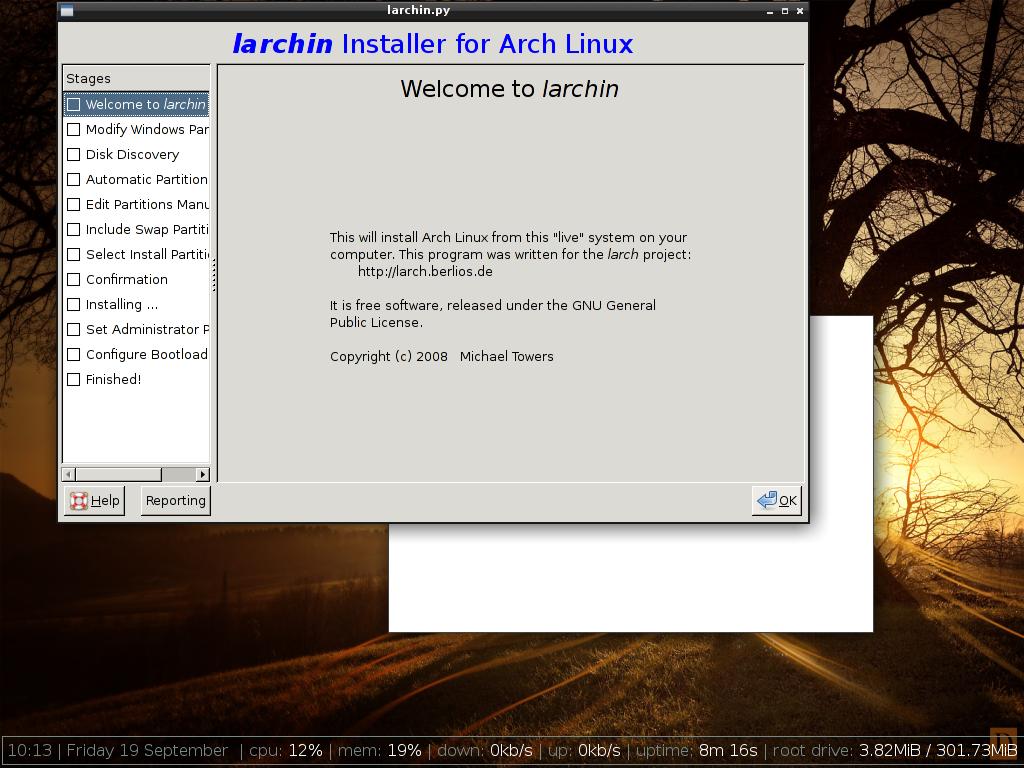
Open a Terminal by clicking terminal, then simply type "sudo /opt/larchin/run/larchin.py" entering guest for the password when prompted. After a moment, the installer will pop up like so. Personally, with Linux installations I like getting the hard part out of the way first so once Larchin is up click on "Edit Partitions Manually" and then select the Gparted option like this. It will pop up Gparted which should look something like this if you're on a Windows only or Mac only machine. If you're partition layout is more complicated than that (i.e. your drive doesn't end in one large partition) than you may want to ask a friend (or me) for help. I'll be more than happy to give you a hand over the phone or, if possibly, in person.
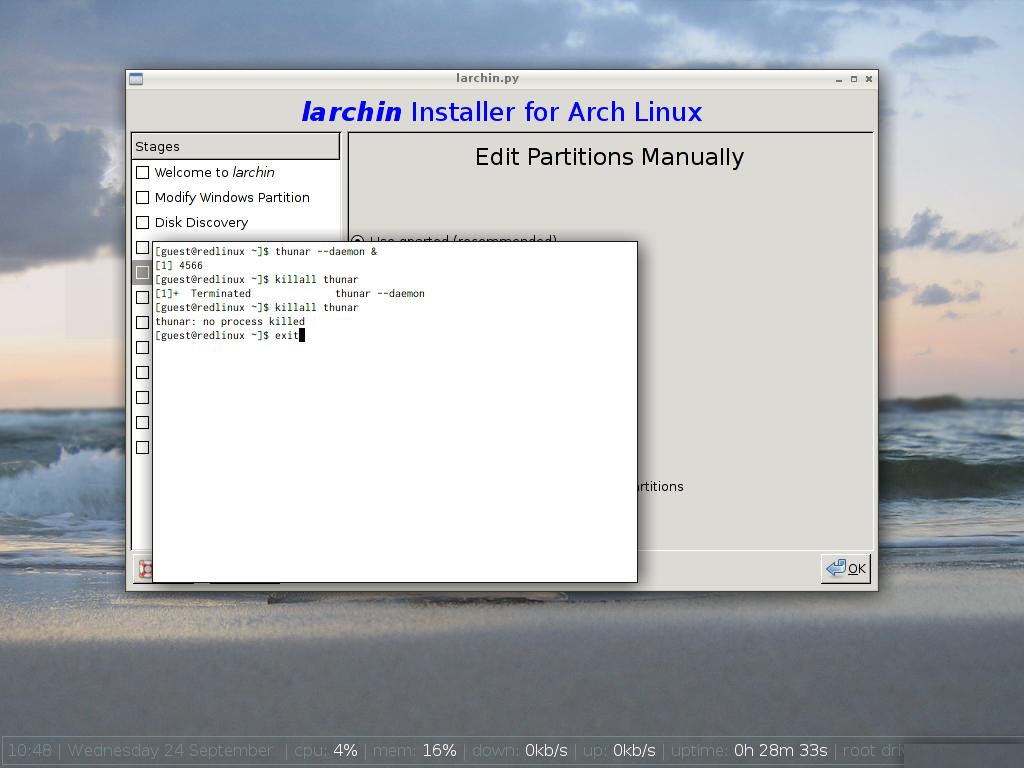
It would also be a good idea at this point to pull up another terminal as before and typing "killall thunar" to make sure that the file manager doesn't try to automatically open any of the partitions as you're working on them. If the terminal complains that there is no thunar process when you tell it to killall them, then you're in good shape and can get back to Gparted. Just type exit to close the terminal.
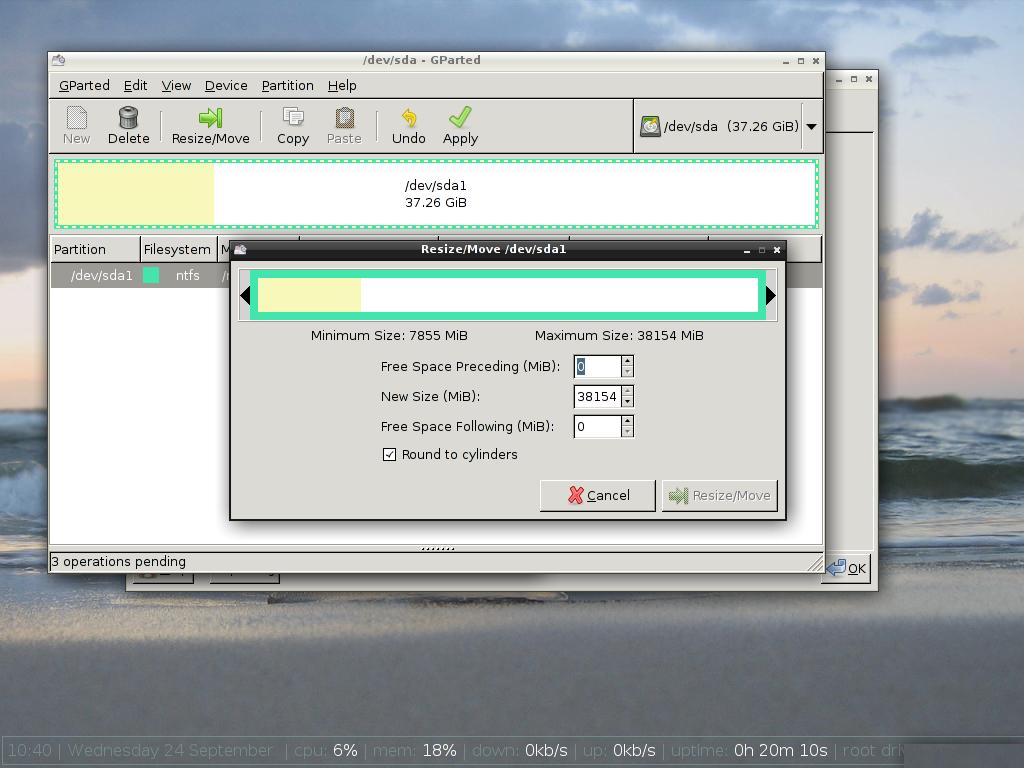
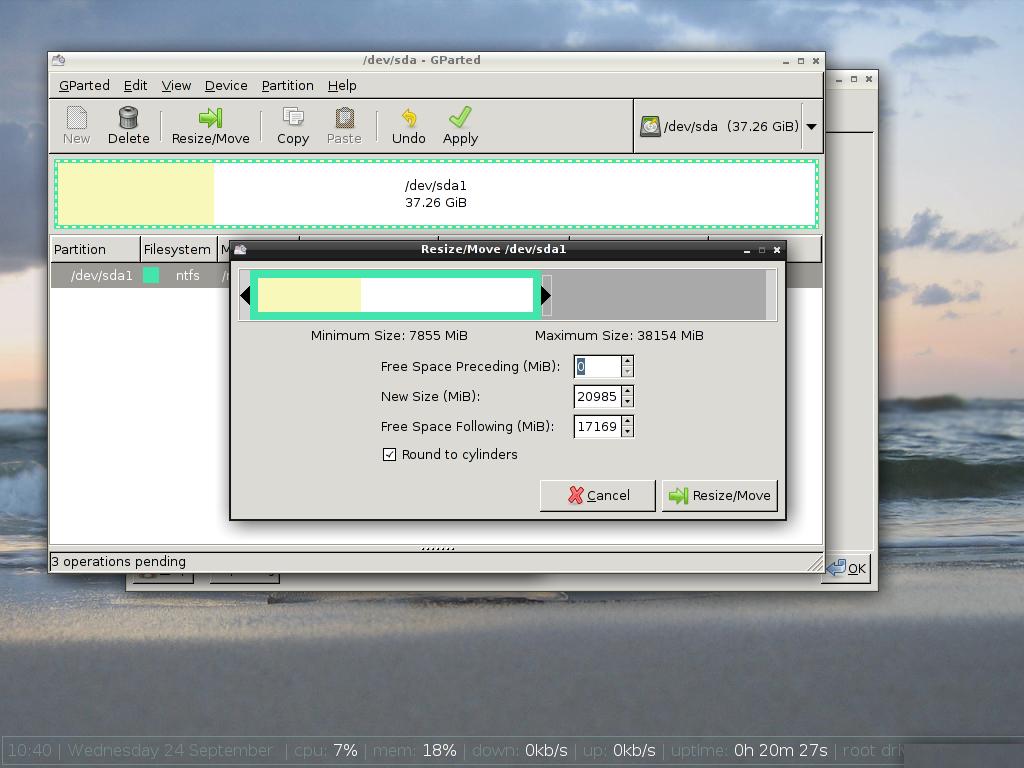
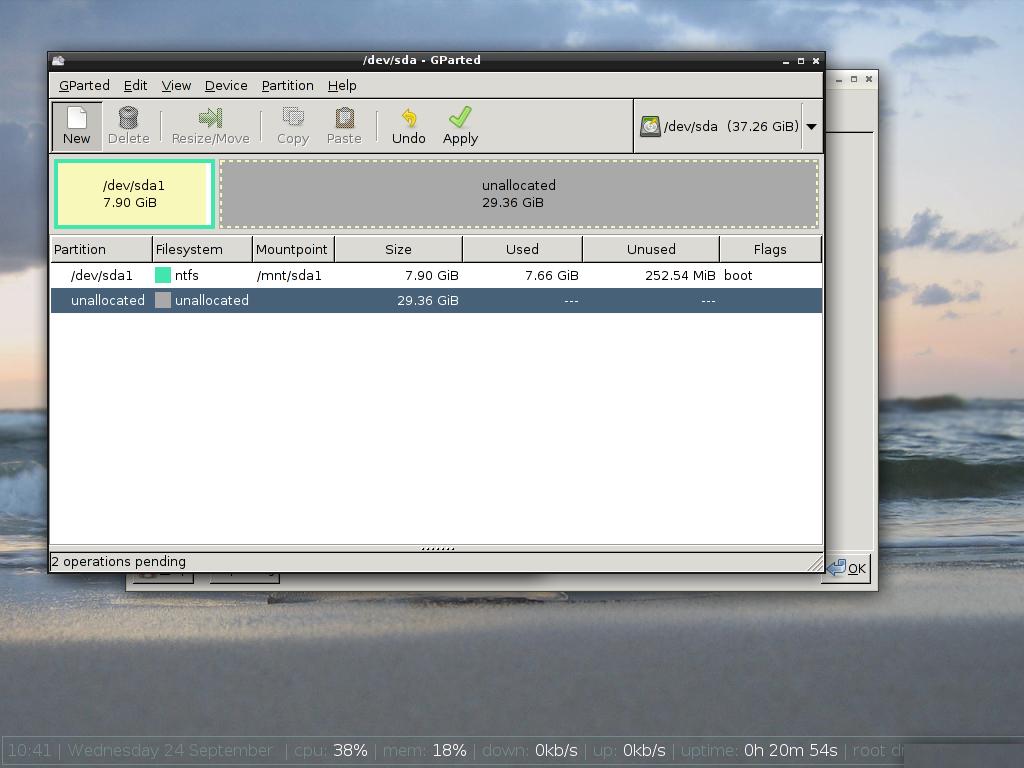
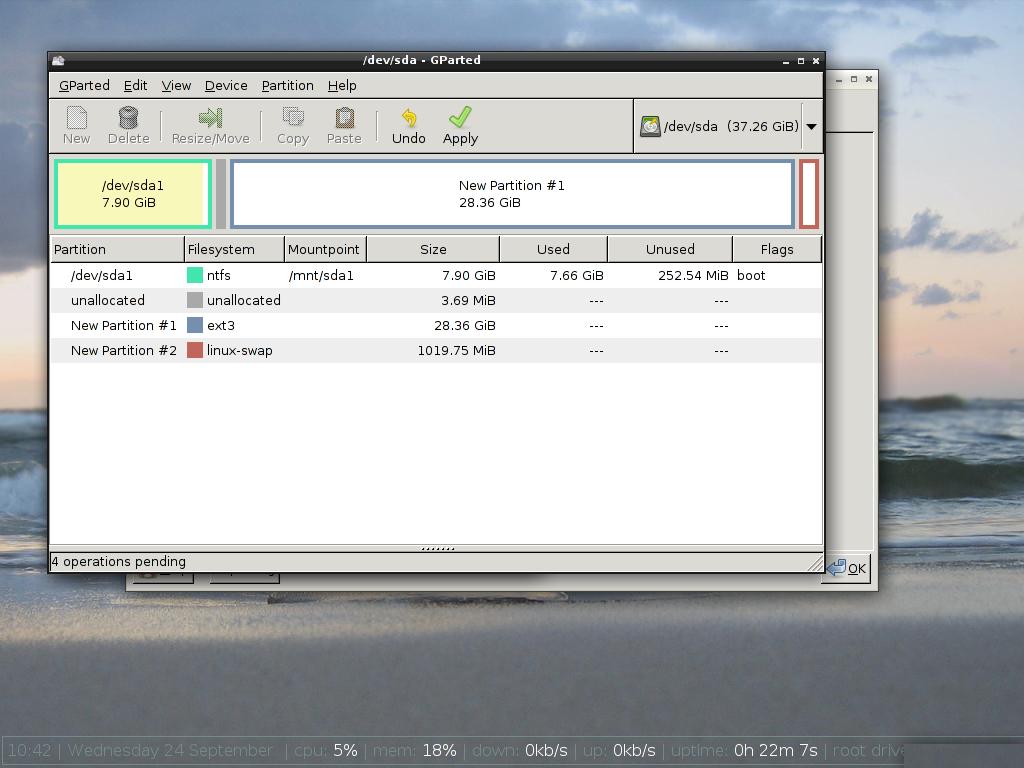
Once back in Gparted, click on the partition and select the resize button in the top left to get this screen, then click the ending right arrow and drag it to the left to shrink the partition like so. Once installed, RedLinux will take up about 2.5GB (~2500MB) so I'd give it at least 3000MB but you can go as high as Gparted will let you really. Click "Resize/move" once you're satisfied and you should end up hereabouts. Select the unallocated space and click the new partition button to get this dialog. Set the filesystem to be ext3 and then reduce the size until a little over 1000MB of free space will remain afterwards, then click add. Select the unallocated space and click the new partition button once again, this time setting the file-system type to linux-swap and then clicking add and you should end up with something like this. Before moving forward, note the /dev/sda* numbers of your partitions. Know which one is swap and which is ext3.
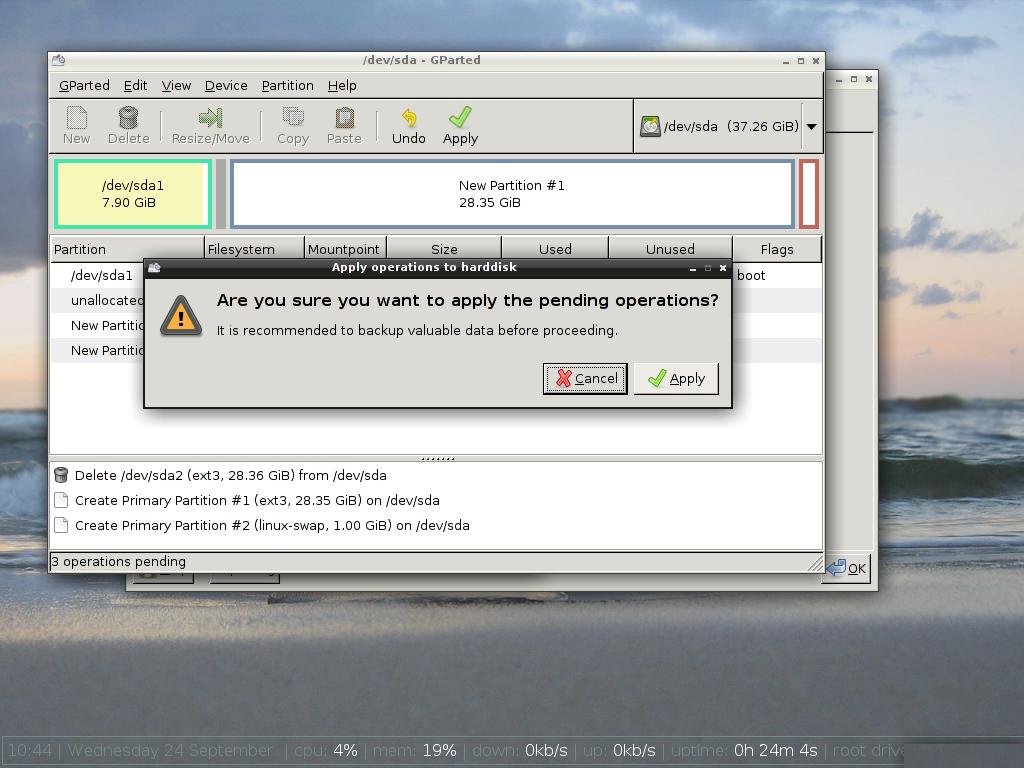
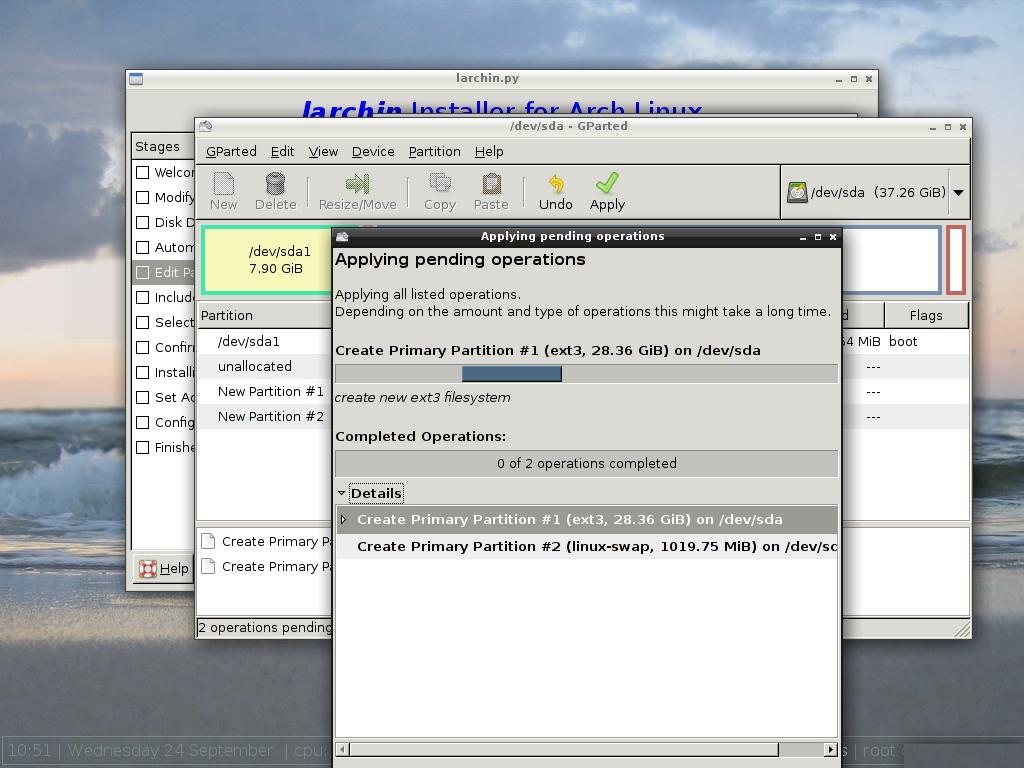
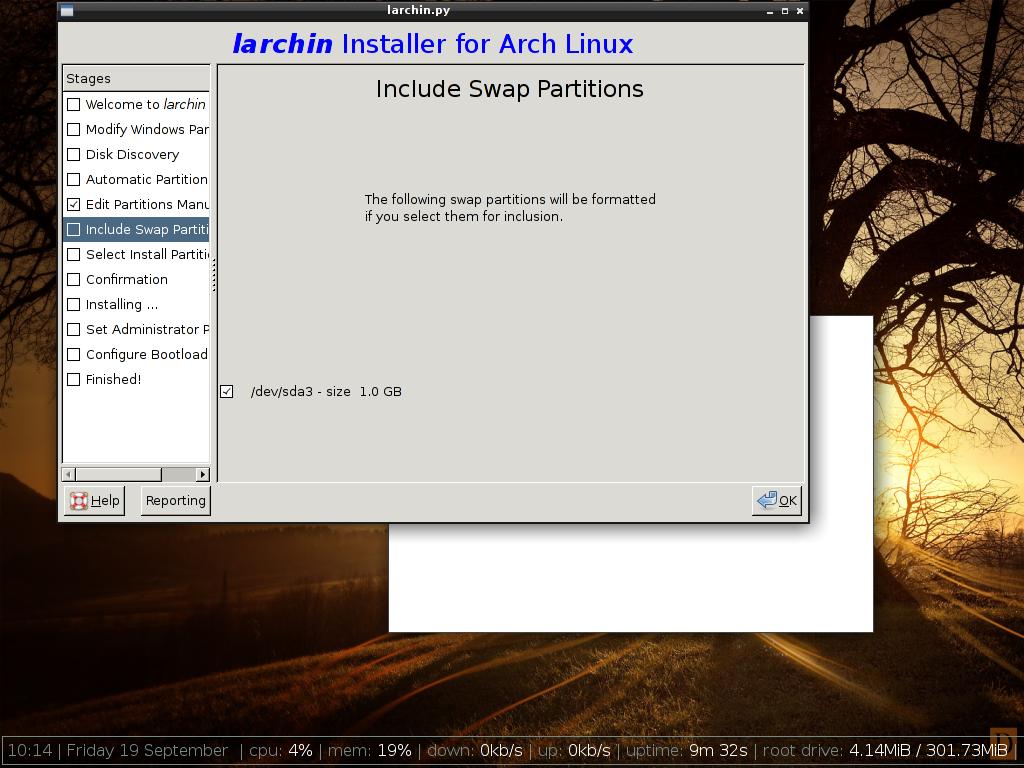
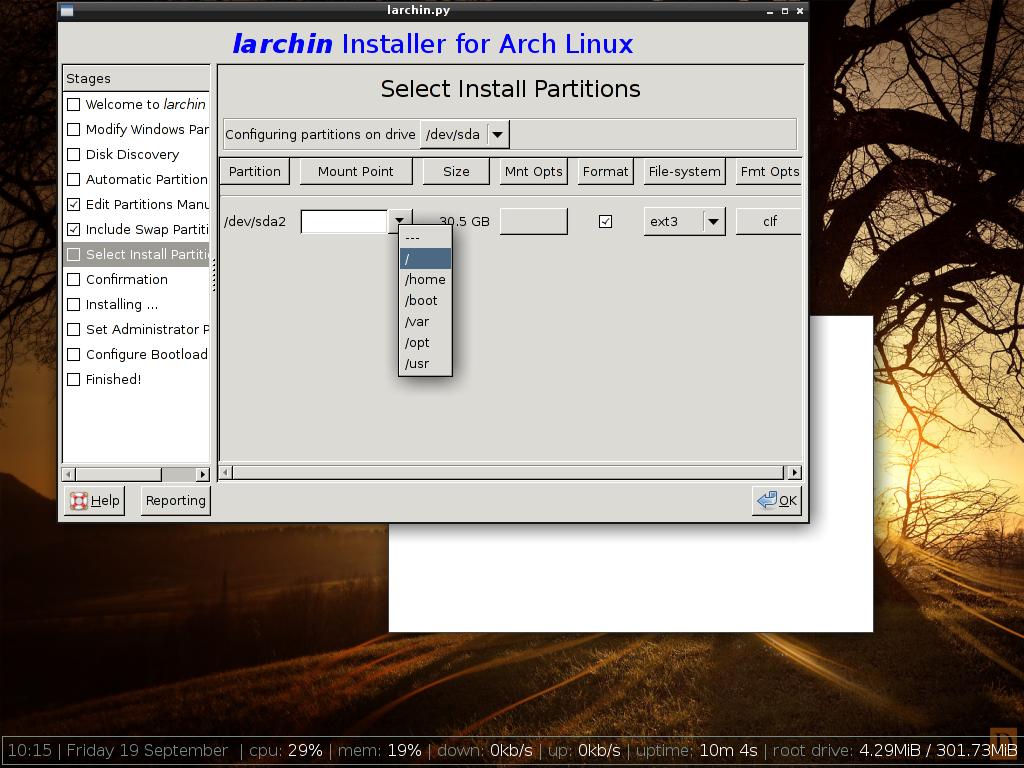
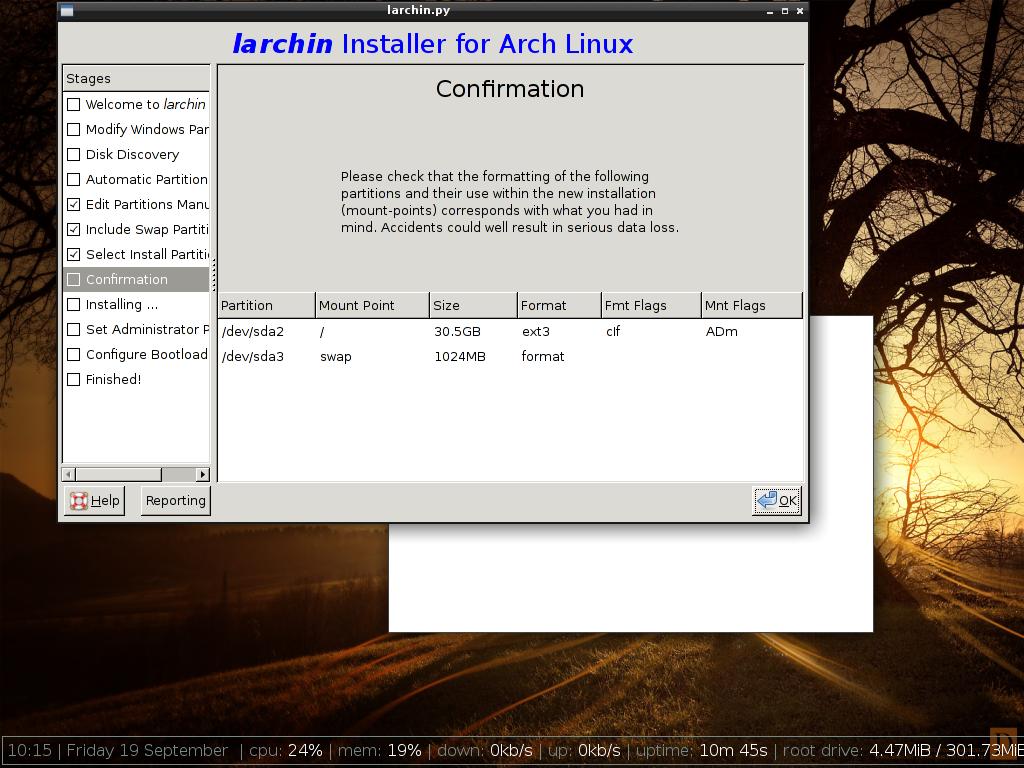
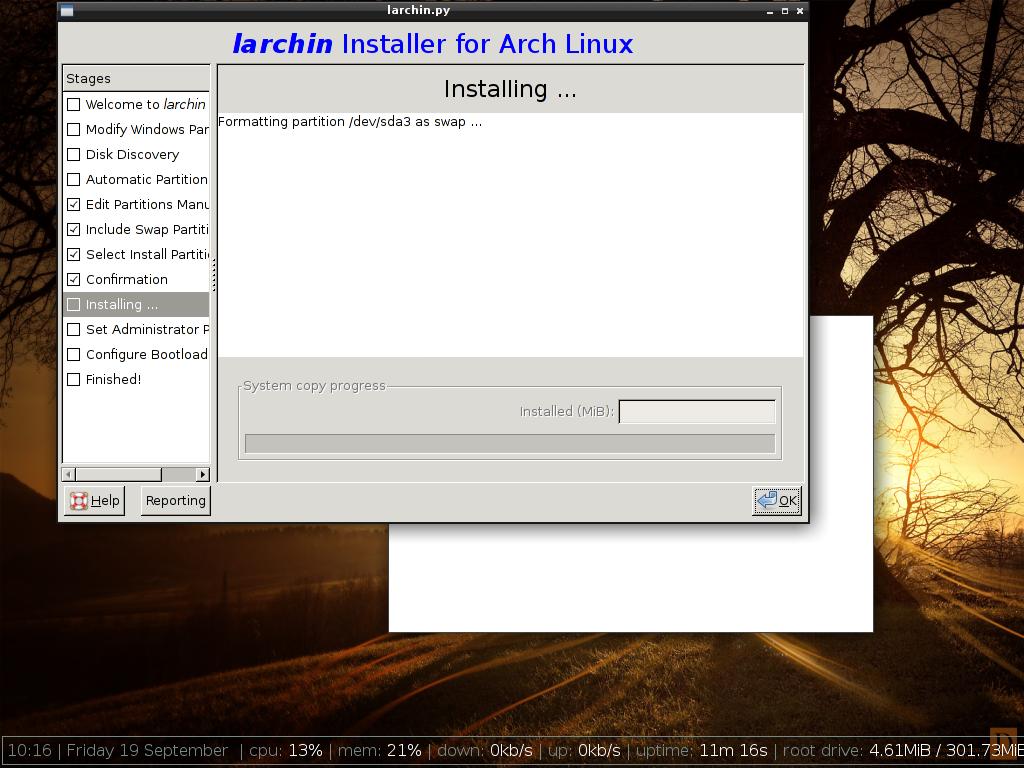
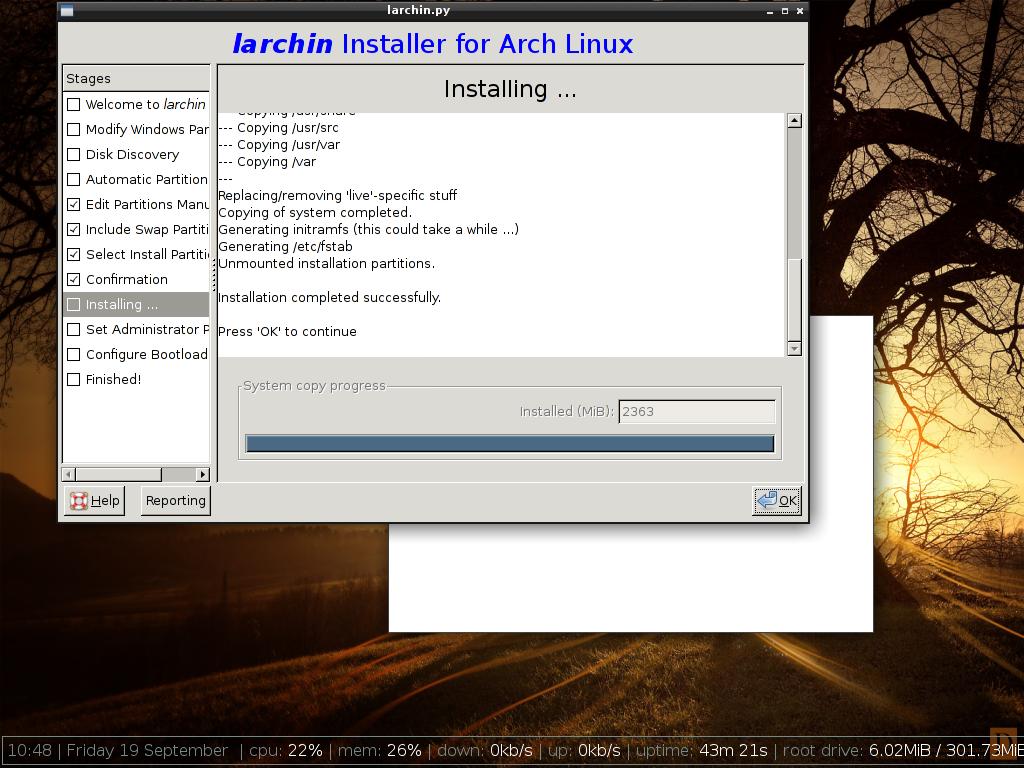
You've now reached the scary/boring step. Click the apply button near the top center and click the apply confirmation to have Gparted save your changes to the disk. This could take anywhere from 10-20 minutes depending on the size of your hard disk but shouldn't take much longer than that. Once it's done, exit Gparted and select "Use existing partitions/finished editing partitions" in the Larchin installer. It will ask you about the swap partition at the next screen, and the box next to your swap partition number should be checked. Click okay. It will now ask you to select the install partition and should have defaulted to your ext3 partition. Hit the checkbox under format and click the dropdown under Mount Point to select "/". It will request one more confirmation that it has your information down correctly. Hit okay to proceed. The installation will proceed accordingly.
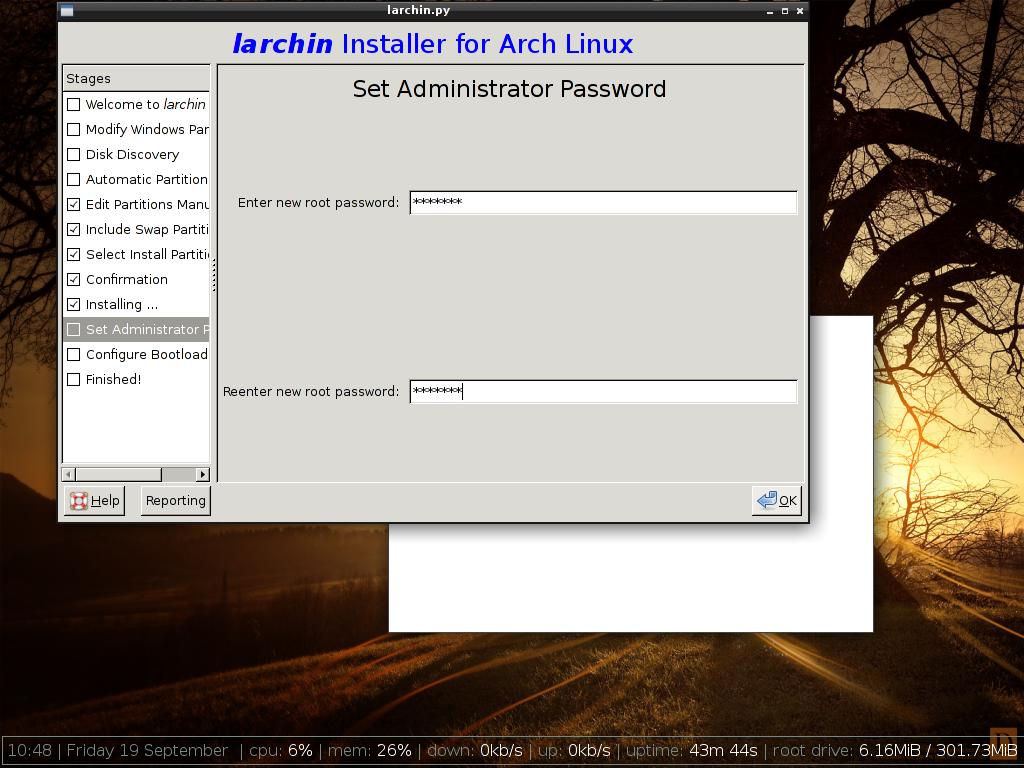
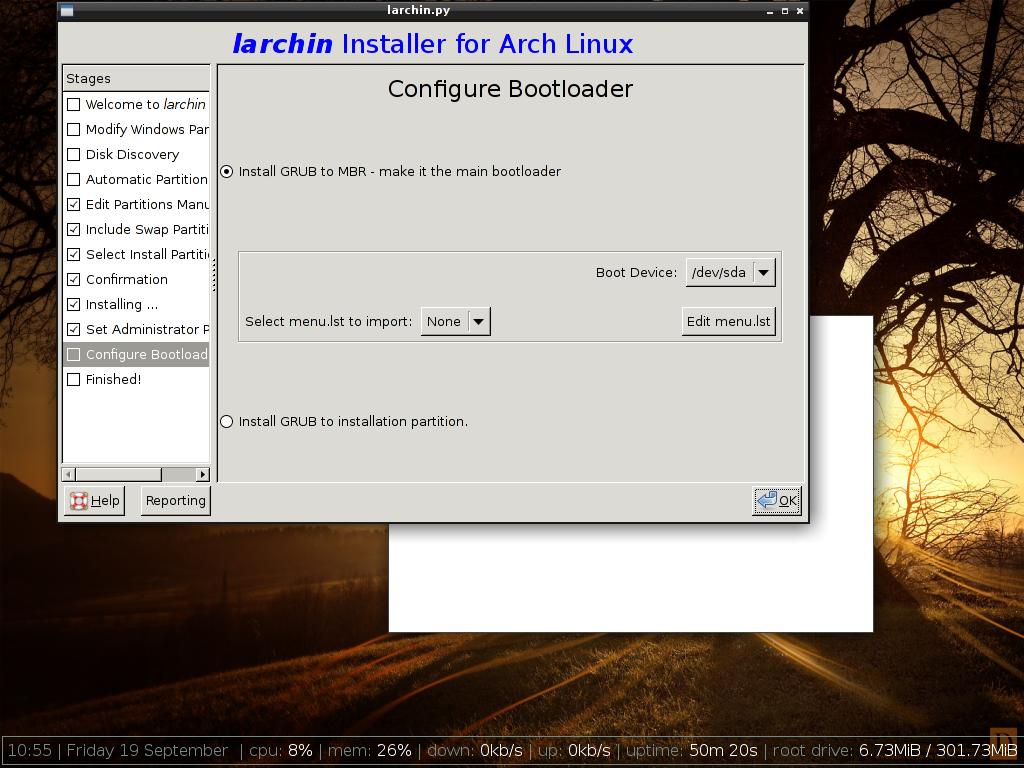
Almost done. All you need to do now is give it a root password (this is not the same as your regular logon/user password. Pick something that else that you'll remember). Write it down somewhere if it makes you feel more comfortable. You really shouldn't ever need it. Last but not least, tell it to install grub to your MBR and you're done! Click okay to exit the installer and then right-click on the desktop and click reboot. When you're computer reboots you should have the option of booting into your brand new RedLinux install. The username and password will still be guest, so read the new_user_guide online or by logging in, right-clicking to open the start menu, opening a text editor and then opening "new_user_guide.txt". Happy hacking!
Unless otherwise credited all material  by Brit Butler
 ![]()